Lock-In Top-Down Shots With a Heavy-Duty Overhead Arm
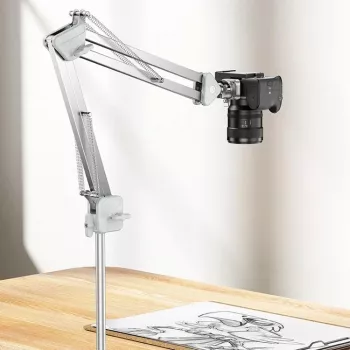
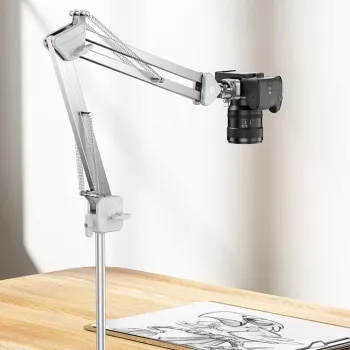
Heavy-Duty Articulating Overhead Camera Mount for Stable Top-Down Shooting
Top-down video and product photography work best when the camera stays locked in position, the rig clears the workspace, and adjustments are quick. A heavy-duty articulating overhead camera mount is designed to hold the camera securely above a desk or bench while providing reach, rotation, and angle control for consistent overhead framing. When the mount is stable, you spend less time re-leveling and re-cropping, and more time creating clean tutorials, demos, and product shots. For more guidance, see VideoSecu CCTV Camera Ceiling Mount Bracket ….
What an articulating overhead mount does well
- Creates a true top-down perspective without a floor tripod getting in the way
- Uses articulated joints to position the camera over the subject and fine-tune composition
- Improves repeatability for tutorials, unboxings, craft work, repair videos, and product photos
- Helps keep the shooting area clear for hands, tools, and lighting
For small work surfaces, an overhead arm also makes it easier to keep the background consistent. Instead of moving a tripod leg-by-leg, you can float the camera exactly above your “work zone” and return to the same framing session after session. For further reading, see Tripod (photography).
Key parts to understand before buying
- Mounting method: desk clamp, wall mount, or stand base; choose based on workspace and load
- Arm design: single arm vs multi-joint articulation; more joints add flexibility but require solid locking
- Head interface: ball head, tilt head, or direct plate; affects speed of leveling and framing
- Camera attachment: common screw sizes (typically 1/4″-20) and compatibility with quick-release plates
- Cable management: routing points or clips reduce tugging and accidental drift
If overhead shooting is a frequent task, prioritize joints that lock down firmly and a clamp/base that won’t flex. A “good enough” arm can feel fine at first, then slowly creep during a long take—especially when cables start shifting.
Stability and load considerations that matter in real setups
- Total load is more than the camera body: include lens, cage, mic, HDMI capture dongle, and any counterweights
- Longer reach increases torque: even light cameras can sag when extended far from the clamp point
- Look for locking joints that resist creep: especially for long recording sessions
- Vibration sources: typing, desk bumps, and cable pulls; isolate the desk when possible and add strain relief
- If using a heavy lens: keep the arm shorter and center mass above the clamp/anchor
A practical rule: if you can shorten the arm and still capture the same scene, do it. Less extension usually means less bounce, less drift, and a steadier “locked-off” look. For tabletop product photography, this can be the difference between crisp detail and a subtle blur that’s hard to diagnose.
Quick setup workflow for overhead shooting
- Anchor the clamp to a rigid surface (solid wood/metal is better than hollow particleboard edges)
- Set arm reach first, then angle; tighten from the base outward to minimize drift
- Level the camera for square framing; use in-camera grid lines to align edges and reduce post-cropping
- Add cable slack near the camera and secure cables along the arm to prevent pulling
- Do a short test recording while tapping the desk lightly to identify vibration and adjust
Overhead setup checklist
| Step | What to check | Why it helps |
|---|---|---|
| Clamp/anchor | No wobble at the mounting point; clamp pad fully seated | Prevents micro-shake and slow drift |
| Arm position | Reach is as short as practical for the shot | Reduces sag and increases stiffness |
| Joint locks | Each joint tightened after framing | Stops creeping during longer takes |
| Camera leveling | Grid lines aligned; horizon/edges square | Cleaner overhead look with less cropping |
| Cable strain relief | Cables clipped; slack loop near camera | Prevents accidental tilt when cables move |
Lighting and framing tips for cleaner top-down footage
- Use two soft sources at 45° angles to reduce harsh shadows from hands and tools
- Keep lights out of the reflective path when filming glossy products; raise lights or feather them
- Mark the working area on the desk with subtle tape guides for consistent placement
- Consider a neutral mat or backdrop to stabilize exposure and white balance
- If the camera is centered, keep the arm and clamp out of frame by adjusting the mount’s offset
For more lighting fundamentals that translate well to tabletop scenes, see guidance from B&H Explora and Adobe’s product photography basics.
Who benefits most from a heavy-duty articulating mount
Care, safety, and long-term reliability
Featured options
- Heavy-Duty Articulating Overhead Camera Mount: built for stable top-down positioning with adjustable articulation for precise framing when you need your hands free and your camera steady.
- RGB USB Gaming Microphone with Noise Canceling & One-Touch Mute: a helpful companion for overhead tutorials where clear voice audio matters as much as sharp visuals.
FAQ
Will an overhead articulating mount work with both cameras and phones?
Most setups support cameras via a standard 1/4″-20 screw, while phones usually need a separate phone clamp adapter. Check the head/plate style and keep the total weight within the mount’s practical load range.
How do you stop the camera from sagging over time?
Keep the arm extension as short as possible, tighten locks from the base outward, and position the camera so its center of mass sits closer to the main joints. Add cable strain relief so cords don’t tug on the head during recording.
Is a desk clamp stable enough for overhead filming?
It can be very stable when clamped to a rigid surface and used with minimal reach. If your desk is bouncy or your setup is heavier, reinforce the mounting edge or switch to a wall/stand solution for more rigidity.











Leave a comment